
How to use Gmail with your own custom domain name for free
In this first method, I’ll show you how to set up Gmail with your custom email for free.
With this method, you’ll be able to link your custom domain name to a regular free Gmail account (e.g. username@gmail.com). Then, you’ll be able to send/receive emails using your custom domain from your regular Gmail account.
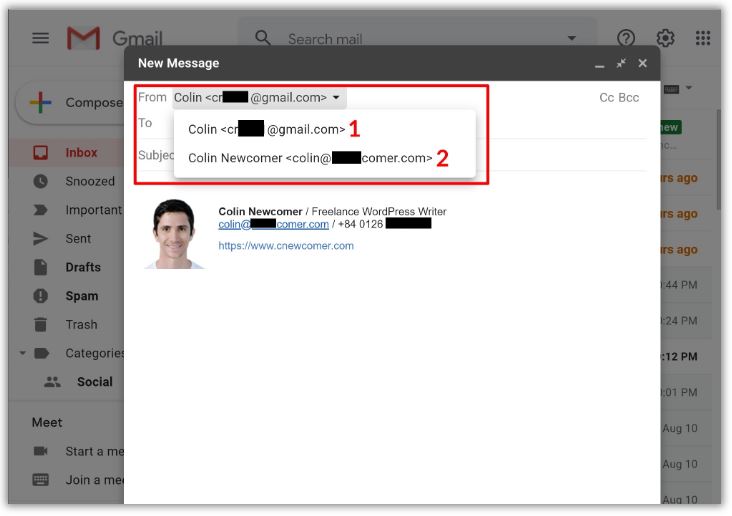
When you compose a new message, you can choose between your free @gmail.com address and your gmail custom domain. If you receive an email at your custom domain, Gmail will automatically respond using that email:
1. Create a regular free Gmail account
To get started, create a regular free Gmail account – e.g. username@gmail.com. If you already have a Gmail account, you can use your existing account.
However, remember that the emails for your custom domain will be mixed in with any emails to your regular Gmail account, so it might be simpler to create a separate account if you’re already receiving a lot of email at your Gmail address.
2. Allow Gmail to receive emails using POP3
Once you have your custom email account, you’re going to use something called POP3 to connect Gmail to your custom email address. Essentially, these settings let your free Gmail account import emails from your email hosting (Bluehost in our example, but it could be different for you).
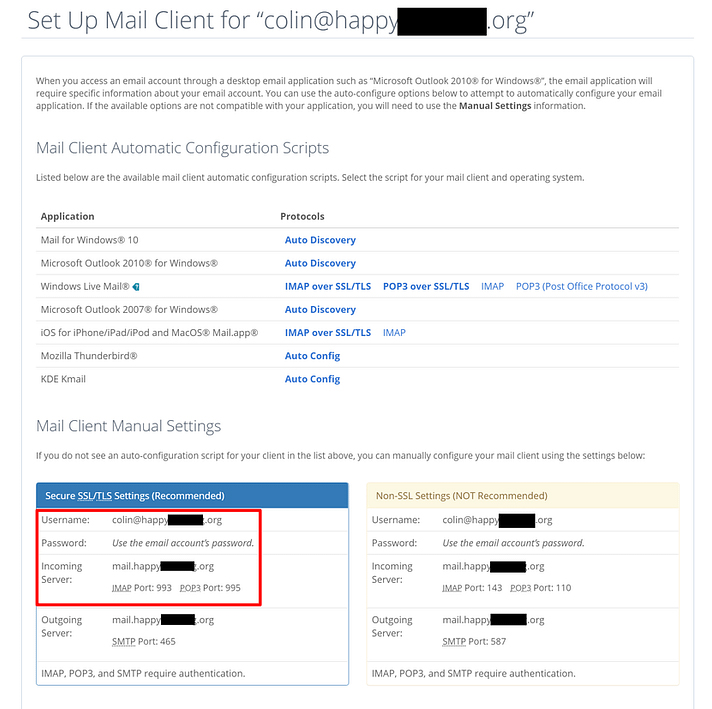
If your email hosting is elsewhere, you’ll want to consult your service’s documentation or reach out to their support if you can’t find your POP3 information.
Then:
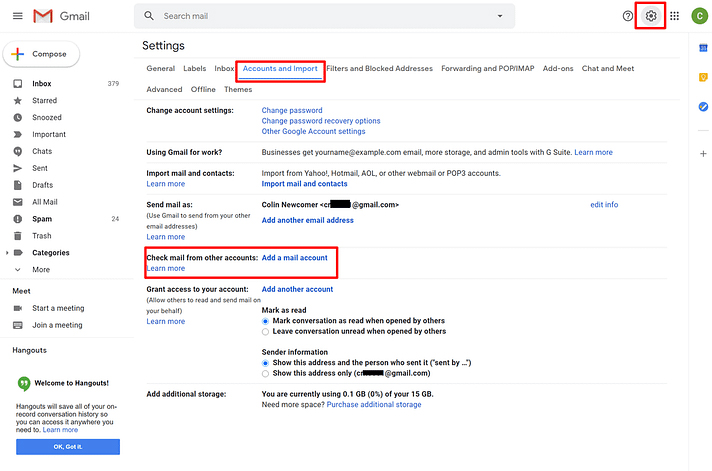
- Open the Gmail settings by clicking the gear icon in the top-right corner and selecting See all settings.
- Go to the Accounts and Import tab.
- Find the Check mail from other accounts setting.
- Click Add a mail account.
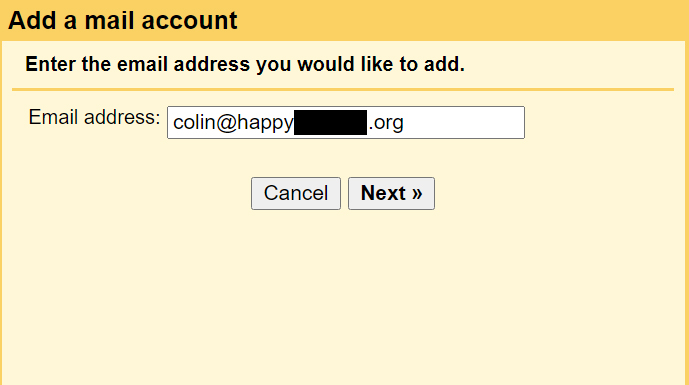
That should open a popup with multiple steps.
In the first step, enter your custom email address – e.g. you@yoursite.com:
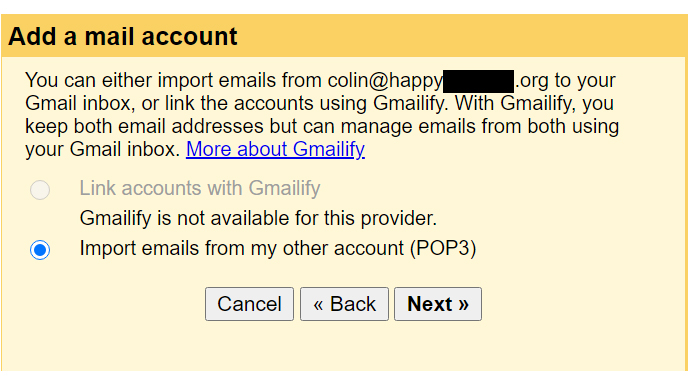
On the next step, choose Import emails from my other account (POP3):
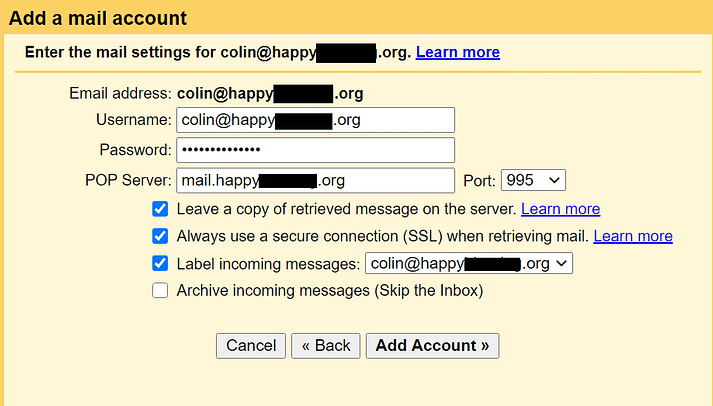
Enter the following information:
- Username – normally, this is your full email address, but sometimes it’s only the part that comes before @.
- Password – the password that you set when creating your custom email address.
- POP Server and Port – from your email host.
- Check the Leave a copy… box.
- Check the Always use a secure connection… box.
- Optionally choose to add a label.
- Click Add Account to finish the process.
3. Allow Gmail to send emails using SMTP
At this point, new emails to your custom domain should show up in your Gmail account. However, you won’t be able to reply to them from your custom email domain yet.
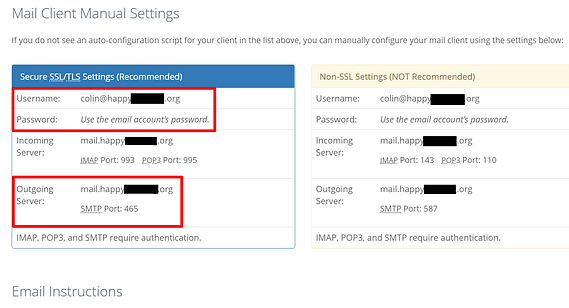
To fix that, you need to configure your Gmail account to send through your custom email’s SMTP server. Typically, you’ll find your email’s SMTP server information at the same spot where you found the POP3 information:
Once you have your SMTP information:
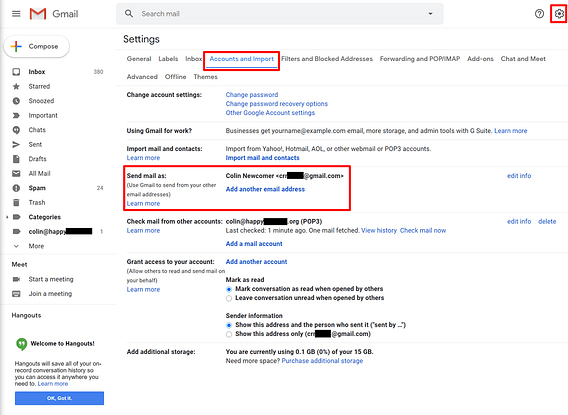
- Go back to the Accounts and Import area in your Gmail account’s settings.
- Find the Send mail as setting.
- Click Add another email.
This will open another popup window that has multiple steps.
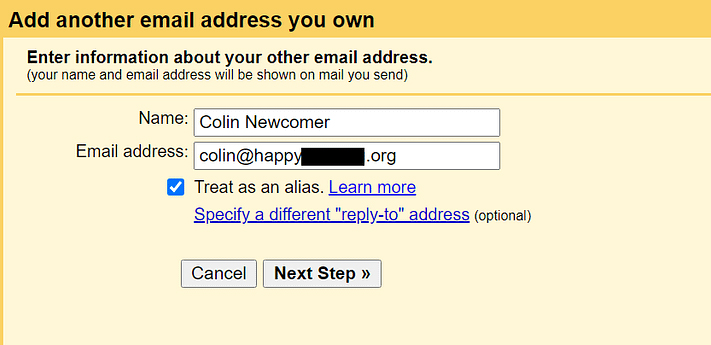
On the first screen:
- Enter your name.
- Enter the custom email address that you’re using.
- Check the box for Treat as an alias.
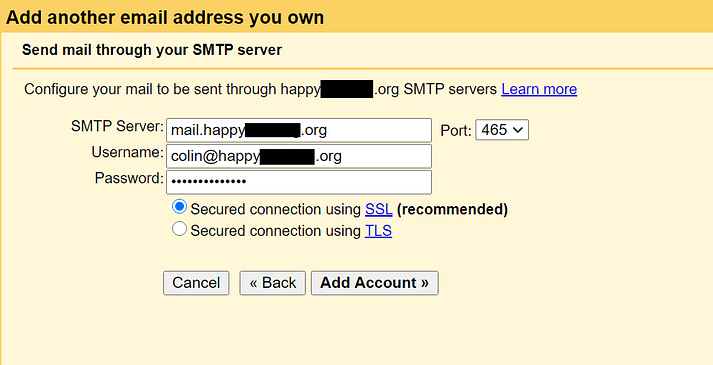
Next, enter the SMTP information from your email host:
- SMTP Server and Port – from your email host.
- Username – normally, this is your full email address, but sometimes it’s only the part that comes before @.
- Password – the password that you set when creating your custom email address.
- Choose whichever Secured connection method that Gmail recommends.
- Click Add Account.
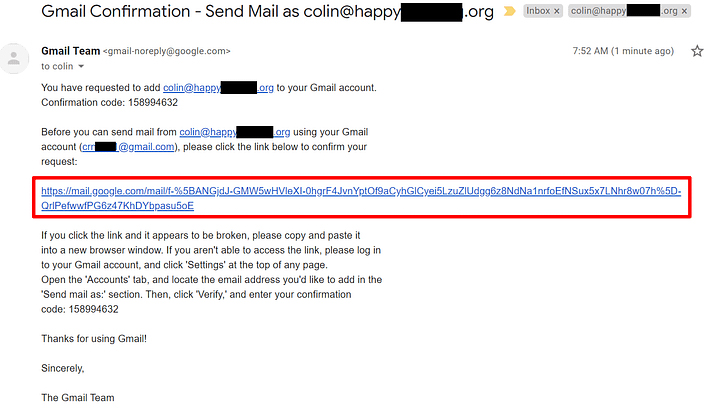
Gmail will then send a confirmation code to your custom email address. You need to click the link in that email and click Confirm to finish the process.
Since you already configured Gmail to receive emails from your custom domain name, you should be able to receive this email from your Gmail account. It might take a few minutes for Gmail to fetch the email from your server.
4. Test!
At this point, you should be ready to rock. You can send and receive some test emails to make sure it’s working.
When you compose a new email in Gmail, you should be able to choose which email to send from above the To line:
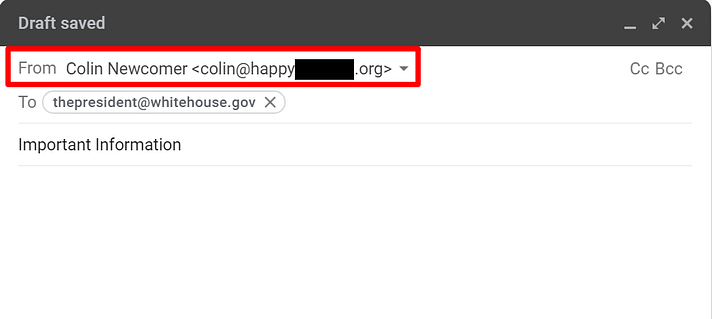
If everything works, you’re all done!